CI for Flex Mobile Applications – Part 0: The Setup
- Getting started
- Tools used in this tutorial
- Plugins
- Configuring Jenkins
- Job parameters
- Source Code Management
- Our first build step
- Preparing the build script
- Step 4: Test everything out
- What we have done so far
T his is the first in a series of posts where I’ll describe the process of setting up a Continuous Integration process to build a mobile app created with Flex. I will use Jenkins as a CI server and ANT for my build scripts.
This first article is about getting started and setting up the right tools.
Getting started
Before you get started you should make sure you have the following ready:
- a server running Windows that you have administrator rights to and that you can access over your local network (or over the internet, if you prefer). It is important that your server runs on Windows, since Adobe has abandoned Linux support some time ago. An old PC will do for most cases, although the build process can get quire ressource intensive, especially when having multiple jobs. I used my old P4 with 1GB Ram and 2.53GHz for it, which was just enough.
- your Code hosted on Github. The steps in this tutorial assume you have your code on GitHub, but you can also host your code on your own Git server. The steps should be similar.
- An Android certificate in the
*.p12format. - An iOS development certificate in the
*.p12format - An iOS mobile provisioning profile in the
*.mobileprovisionformat
Tools used in this tutorial
To accomplish what is described in the following articles you will need to install the following tools on your server. I won’t go through the process of installing the tools. Please refer to the official documentation if you need further help with the installation. Make sure you download the latest version in each case (for Flex it is 4.12.0 and for AIR 4.0 as of the time of this writing).
-
Apache Flex SDK: You need to download the SDK in the version you built your app with on your local machine. If you have multiple apps with different versions of Flex, you need to have a copy of each version in separate folders (see description below for a proposed folder structure). The easiest way to do this is to use the Flex Installer, which lets you select the AIR version you wish to use (see next point).
-
Adobe AIR SDK: You need to have the AIR ADK in the version you want to build your app with (generally the newest version). As stated above, the easiest way to get it is downloading Flex with the installer available at the Apache Flex homepage. However, should you wish to install the AIR SDK over an existing copy of the Flex SDK (e.g. if you want to build the bleeding edge version of the SDK manually or you have a very old version of Flex, which is not in available for download in the Flex Installer), you can get it from Adobe under the link below. To install the AIR SDK simply unzip the contents of the downloaded ZIP-file into the base folder of your Flex SDK. If you combine the same Flex version with different AIR versions, you need a separate folder for each combination.
- Jenkins: Jenkins is a CI server which will run all the automated tasks we are going to create later.
- Apache ANT: We will use ANT as the scripting language to describe the tasks needed to run the automated tasks.
- ant-contrib: Some steps described later will need the support of some extensions to ANT that are included in ant-contrib.
- Java JDK: Although a JRE (Java Runtime Environment) would be sufficient I recommend installing the JDK on a server since it contains additional tools you may or may not need and includes the JRE.
- Git: We will need this client to check out your code from Github and also check out some other projects we are going to need. Make sure you install the client following the instructions from Github. You should generate and add your keys to your Github account in order for Jenkins to check out code.
If you didn’t use the Flex installer to download the Flex and AIR SDK, make sure you select the Original SDK without the new compiler, since the new Falcon compiler does not support MXML files, which are used by Flex!
Step 1: Setting up the server
Your CI server must run on Windows since Adobe AIR is not supported on Linux anymore. Although running the scripts on a Unix server may work for Android deploys to some extent, you will not be able to release iOS-Versions of your app under Linux.
Folder structure
I recommend the following folder structure. Of course you are free to install the tools in the locations of your choice, but the rest of this tutorial relies on the files lying in the following folders:
- Root folder (in my case it’s the D:/ drive)
- jenkins (this folder contains the Jenkins installation and nothing else)
- sdk (this folder will host any SDKs you have on your machine, including Flex SDKs)
- flex (sub-folder for the different Flex/AIR-SDKs
- 4.11.0_AIR4.0
- 4.11.0_AIR3.9
- … (one folder for each Flex/AIR combination
- … (any other SDKs you may have, e.g. in case you are building native Android applications on the same server)
- flex (sub-folder for the different Flex/AIR-SDKs
- tools
- ant (your installation of Ant, including ant-contrib)
- … (other tools you may have, such as Maven, which is not needed in this tutorial)
- cert (this folder contains all the certificate and mobileprovisioning profiles)
Please note the naming pattern for the Flex-SDK folders. It is always build up as
Flex-Version + "_AIR" + AIR-Version
This is a convention I have come to use which lets me build my app using different versions of Flex or AIR with the same job, without having separate build scripts or different jobs.
Setting the paths
After you have installed the tools, you need to set some environment variables on your machine. This step is not explicitly required to run a build script with jenkins since Jenkins comes with the option to define the paths directly over the web interface. However, you may want to test your script on your local machine before uploading it to GitHub or make the tools globally accessible for any other tool you might want. For this you need to set the following environment variables to make sure your scripts will find the executables for each tool:
-
%ANT_HOME%: path to your ant installation folder (e.g.D:\tools\ant) -
%JAVA_HOME%: path to your JDK installation folder (e.g.C:\Program Files (x86)\Java\jdk1.8.0) -
%GIT_HOME%: path to your Git installation folder (e.g.C:\Program Files (x86)\Git) -
%HOME%: path to the directory, where you have your.ssh-Folder (usually your user home path, e.g.C:\Users\Daniel)
Next: add the following paths to your system environmental variables:
%ANT_HOME%\bin;%JAVA_HOME%\bin;%GIT_HOME%\bin
Step 2: Installing Jenkins
This should also not be a problem since Jenkins comes with its own installer. Just make sure you install it as a service (which should be done automatically on Windows) so you don’t have to start it manually each time you restart your server. Install Jenkins into the directory specified above.
Plugins
Jenkins should be able to run the ANT-scripts without the need of additional plugins. However, for convenience purposes I recommend the installation of the following plugins (if not installed by default):
- Jenkins Ant Plugin
- Jenkins GitHub plugin
- Jenkins Git plugin
- Jenkins FTP-Publisher plugin
- Jenkins Javadoc plugin
-
Jenkins GreenBalls plugin and Jenkins ChuckNorris plugin plugin

Configuring Jenkins
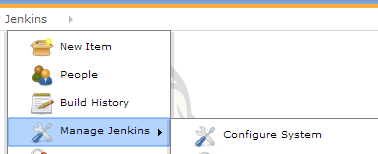
Your Jenkins Server should be accessible under its url (http://YourServerName:8080). After you installed the plugins, some minimal configuration is neccessary to get started. Go to Jenkins > Manage Jenkins > Configure System.
Configuring Git
For Jenkins to be able to check out your code, it must know where your Git client is located. For this we have to specify a Git installation with the path to the executable.
Unter the section Git enter the full path to your git.exe:

Jenkins environment variables
Next, you need to set two environmental variables which will be available in any job:
- sdk_dir: This variable specifies the directory, where Jenkins will look for Flex SDKs
- cert_dir: This variable specifies the directory, where Jenkins will look for certificates or provisioning profiles.

It is also possible to set it individually for each job (read below where we set up the job parameters), but since it is unlikely that you have different locations for your SDK, this doesn’t make much sense.
That’s it. That should be enough for jenkins to get ready and check out your code.
Step 3: Preparing the job
To run the whole CI process we need to create a new job in Jenkins. You can easily do this from the start page of Jenkins by .

Next, choose a name for your project. Any name will do. Just make sure you selected “Build a free-style software project” as your option and then click OK.
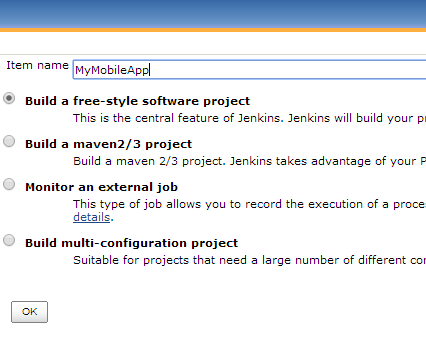
This will take you to the job configuration page, where we will set some parameters used by our job and/or build script.
Job parameters
Since we’re building a GitHub project, enter the URL (the one you would use for cloning with your client) into the field provided:

I recommend using a parameterized job with the following parameters. You can do this by checking the following parameter in your job configuration on Jenkins.

This will allow us to run certain steps conditionally by querying the environmental parameters in the script file. Like this we can specify the steps being executed in each run or just use the defaults. This makes our job extremely flexible and easy to test, since you may not want to run the whole script if you only made changes to a single step. I found the following parameters to be useful:
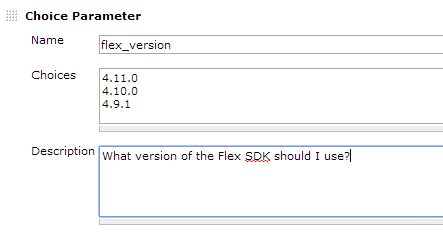
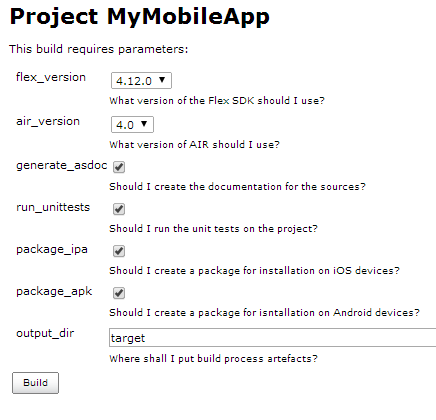
- flex_version (choice parameter): Prepare a list of Flex versions available on your server (in the C:\tools\sdk\flex directory). Make sure you don’t have any typos here and that only versions are listed that are actually installed on your machine since the build script we are going to build relies on the SDK versions lying in folders following a specific naming pattern (see above).
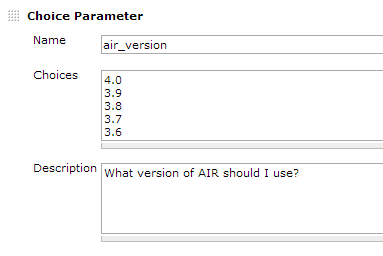
- air_version (choice parameter): Likewise, prepare a list of AIR versions that you have the SDK of
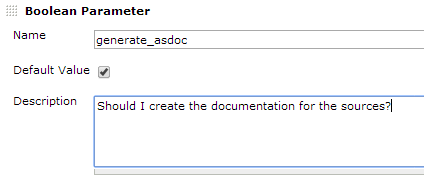
- generate_asdoc (boolean parameter): A parameter to specify whether the ASDOC should be built or not
- run_unittests (boolean parameter): A parameter to specify whether the FlexUnit-Tests should be run or not

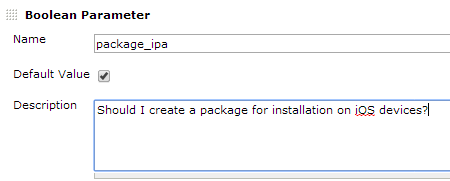
- package_ipa (boolean parameter): Whether an IPA-file should be created for installation on iOS-Devices (this comes in handy if you just want to test your job quickly, because this step requires by far the most time).
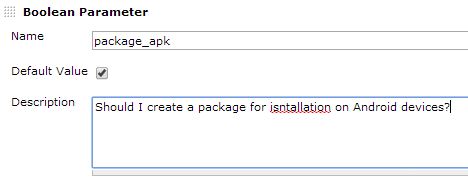
- package_apk (boolean parameter): Whether an APK-File should be created for installation on Android-Devices (you can check this to see if your package-task is generally set up correctly, since packaging an APK is much faster than packaging an IPA and the differences in the script are only minimal).
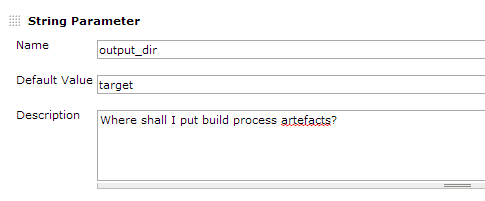
- output_dir (Text parameter): Where the artifacts (SWF File, APK/IPA-File, Documentation, Test Report, …) should be written to. All files will be inside this directory or a subfolder of it.
Source Code Management
Under “Source Code Management” and “Build Triggers” set checkboxes as follows. You can leave away the credentials, since you stored your credentials within your Git authentication agent. If you created your keys, added them to your GitHub project and were able to check out your source code using the Git client on your server, checkout should also work when checking out with Jenkins since Jenkins will use the same client.

Our first build step
As a final step in this first part you have to add “Invoke Ant” as a build step:
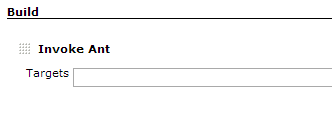
We are goint to add more steps later. This first steps just makes sure our build.xml build script is going to be executed by Jenkins.
After all is set, save your changes and you’ll have your build job ready for execution – almost. Since we don’t have a build script yet, the build step “Invoke Ant” will fail, because it will not find a build script ready for execution. So let’s get this done quickly.
Preparing the build script
By default, Ant will look for a file called build.xml in the root folder. Our build script will continue of this file and two more parts. You also need to place two files into the source directory of your codebase
- build.xml: This is the main script-file containing the different ANT targets (compilation, packaging, testing, documentation, …). Each target will be explained in the following chapters. To get started, I’ll provide you with a scaffolding, which will do nothing excep print out some information.
<project name="My build script" default="start">
	<!-- default target with dependency to all other targets -->
	<target name="start" depends="init, asdoc, test, compile, package-apk, package-ipa, finish"/>
	<!-- bind the 'env'-prefix to environment variables -->
	<property environment="env"/>

	<!-- load previously defined configuration properties file: Exchange this file if necessary (e.g. for one for each job) -->
	<property file="build.properties" />

	<!-- Task definition of common Flex Ant tasks -->
	<taskdef resource="flexTasks.tasks" classpath="${FLEX.root}/ant/lib/flexTasks.jar" />

	<!-- ant-contrib extensions for advanced scripting -->
	<taskdef resource="net/sf/antcontrib/antcontrib.properties">
		<classpath>
			<pathelement location="D:\app\apache-ant-1.9.3\lib\ant-contrib-1.0b3.jar"/>
		</classpath>
	</taskdef>

	<!-- FLEX_HOME must be set in order for some scripts to work -->
	<property name="FLEX_HOME" value="${FLEX.root}"></property>

	<!-- delete and create the target directories again -->
	<target name="init">
		<tstamp>
			<format property="time.start" pattern="yyyy-MM-dd hh:mm:ss aa" />
		</tstamp>

		<echo level="info">BUILD STARTED AT ${time.start}</echo>
		<echo> </echo>

		<!-- Perform some initialization tasks (in separate file) -->
		<ant antfile="build.init.xml" inheritall="true"/>

	</target>

	<!-- Compile Classes (Stub) -->
	<target name="compile">
		<echo>Compiling...</echo>
		<echo>============</echo>

	</target>

	<!-- Run Unit Test (Stub) -->
	<target name="test" if="${env.run_unittests}">
		<echo>Testing...</echo>
		<echo>==========</echo>
	</target>

	<!-- Package for Android (Stub) -->
	<target name="package-apk" if="${env.package_android}">
		<echo>Packaging for Android...</echo>
		<echo>========================</echo>
	</target>

	<!-- Package for iOS (Stub) -->
	<target name="package-ipa" if="${env.package_ios}">
		<echo>Packaging for iOS...</echo>
		<echo>====================</echo>
	</target>

	<!-- Generate Documentation (Stub) -->
	<target name="asdoc" if="${env.create_asdoc}" >
		<echo>Generating ASDOC...</echo>
		<echo>===================</echo>
	</target>

	<!-- Show report -->
	<target name="finish">
		<tstamp>
			<format property="time.end" pattern="yyyy-MM-dd hh:mm:ss aa" />
		</tstamp>
		<echo level="info">BUILD FINISHED AT ${time.start}</echo>
	</target>

</project>
- build.properties: This separate file contains platform specific properties that can be used to configure the script-file mentioned above. The file contains for example all the platform and project specific attributes and will be loaded by the build-script and is a simple way of externalizing variable values that are used in the build script. If the build-script does not contain any project specific attributes, you can re-use the build.xml for any project you have, simply by replacing the build.properties-file with another version containing the appropriate values.
You should adjust at least the following parameters:
META.name: Name of your project (can be any value)
META.author.name: Your name
META.author.email: Your e-mail address
META.copyright: Any copyright information
OUTPUT.name.android: Name of your APK file (should not contain spaces or extra characters)
OUTPUT.name.ios: Name of your IPA file (should not contain spaces or extra characters)
PROJECT.app.name: Name of your app (must correspond with the *.mxml file in the main source folder)
#--------------------------------------------------------------
# Metadata
#--------------------------------------------------------------
META.name = Your Project Name
META.author.name = Your name
META.author.email = Your E-Mail
META.copyright = some copyright information

#--------------------------------------------------------------
# Paths and directories
#--------------------------------------------------------------
FLEX.root = ${env.sdk_dir}\\${env.flex_version}_AIR${env.air_version}
FLEX.home = ${FLEX.root}\\frameworks\\libs
FLEX.tasks = ${FLEX.root}\\ant\\lib\\flexTasks.jar
FLEX.plugins.root = ${sdk_dir}\\fb_plugins
FLEX.flexunit = ${FLEX.plugins.root}\\com.adobe.flexbuilder.flexunit_4.7.0.349722

AIR.mxmlc = ${FLEX.root}\\bin\\amxmlc.bat
AIR.adt = ${FLEX.root}\\bin\\adt.bat
AIR.adl = ${FLEX.root}\\bin\\adl.exe
AIR.asdoc = ${FLEX.root}\\bin\\asdoc.bat

#--------------------------------------------------------------
# Project information
#--------------------------------------------------------------
PROJECT.root = ${basedir}\\.
PROJECT.src.main = ${basedir}\\src\\main\\actionscript
PROJECT.src.assets = ${basedir}\\src\\main\\assets
PROJECT.src.skins = ${basedir}\\src\\main\\skins
PROJECT.libs = ${basedir}\\libs
PROJECT.libs.ane = ${PROJECT.libs}\\ane
PROJECT.locale = en_US
# Name of the App (must correspond to .mxml-File in src-Folder)
PROJECT.app.name = MyApp
PROJECT.app.main = ${PROJECT.app.name}.mxml
PROJECT.app.desc = ${PROJECT.app.name}-app.xml

#--------------------------------------------------------------
# Output
#--------------------------------------------------------------
OUTPUT.root = ${basedir}\\${env.output_dir}
OUTPUT.build = ${OUTPUT.root}\\build
OUTPUT.build.ane = ${OUTPUT.build}\\libs\\ane
OUTPUT.doc = ${OUTPUT.root}\\doc
OUTPUT.name.android = my-app.apk
OUTPUT.name.ios = my-app.ipa
OUTPUT.storetype.android = pkcs12
OUTPUT.storetype.ios = pkcs12
OUTPUT.keystore.android = ${env.cert_dir}\\my-android-certificate.p12
OUTPUT.keystore.ios = ${env.cert_dir}\\my-ios-certificate.p12
OUTPUT.storepass.android = Pa$$w0rd
OUTPUT.storepass.ios = $w0rd
OUTPUT.provisioning.adhoc = ${env.cert_dir}\\myProvisioningProfile.mobileprovision

#--------------------------------------------------------------
# ASDOC
#--------------------------------------------------------------
DOC.title = Some ASDOC title
DOC.footer = Some ASDOC footer
- build.init.xml: To make the main build file a bit more readable, I outsourced the script part for initialization (run at the beginning of the script) to a separate file.
<!-- Helper Script to perform some initialization tasks -->
<project name="Build Script for MyApp - initialize" default="initialize">

	<!-- default target with dependencies to all other targets -->
	<target name="initialize" depends="editBuildLabel, deleteTargetDirectories, copyResources, prepareANEFiles"/>

	<echo>Initializing...</echo>
	<echo>===============</echo>

	<!-- initialize directories -->
	<target name="deleteTargetDirectories">
		<!-- Delete + recreate target directory root -->
		<echo level="info">Initializing target directory...</echo>
		<delete dir="${OUTPUT.root}" />
		<mkdir dir="${OUTPUT.root}" />
		<echo>... done!</echo>

		<!-- Delete + recreate old documentation directories -->
		<echo level="info">Initialisiere Doc-Verzeichnis...</echo>
		<delete dir="${OUTPUT.doc}" />
		<mkdir dir="${OUTPUT.doc}" />
		<echo>... done!</echo>

		<!-- Delete + recreate Unit Test output directory -->
		<echo level="info">Initialisiere Doc-Verzeichnis...</echo>
		<delete dir="${OUTPUT.root}\flexUnit" />
		<mkdir dir="${OUTPUT.root}\flexUnit" />
		<echo>... done!</echo>

		<!-- Delete + recreate working dir for Compilation -->
		<echo level="info">Initialisiere Build-Verzeichnis...</echo>
		<delete dir="${OUTPUT.build}" />
		<mkdir dir="${OUTPUT.build}" />
		<echo>... done!</echo>

		<!-- Delete + recreate working dir for native extensions -->
		<echo level="info">Initialisiere Verzeichnis für Native Extensions...</echo>
		<delete dir="${OUTPUT.build.ane}" />
		<mkdir dir="${OUTPUT.build.ane}" />
		<echo>... done!</echo>

	</target>

	<!-- Copy additional resources to the target directory -->
	<target name="copyResources">
		<echo>Copying additional resources...</echo>
		<copy todir="${OUTPUT.build}">
		  <!-- assets folder (if you have one) -->
			<fileset dir="assets" />
			<!-- application descriptor -->
			<fileset dir="src">
				<include name="${PROJECT.app.desc}"/>
			</fileset>
			<!-- include more resources here -->
		</copy>
		<echo>... done!</echo>

	</target>

	<!-- rename Native Extensions (*.ane) to SWC-Files (*.swc) or compilation will fail -->
	<target name="prepareANEFiles">
		<echo>Renaming ANE-files...</echo>
		<copy todir="${OUTPUT.build.ane}">
			<fileset dir="${PROJECT.libs.ane}">
				<include name="**/*.ane" />
			</fileset>
			<globmapper from="*.ane" to="*.swc" />
		</copy>
	</target>

</project>
After you created the files locally, don’t forget to add and push them to your GitHub repository project.
Step 4: Test everything out
Checking the paths
To check whether your paths are correctly set, open a command line and type the following commands:

This should produce some output as seen in the screenshot above. If you get an error saying Windows can’t find the command, you have to check your paths.
- Setting environment variables in Windows: Windows may require you to log off and on again in order for the environment variables to become active.
- Setting an environmental Variable for Flex: You can set an environment variable pointing to the root directory of a Flex distribution if you like. Just make sure you add the %Flex_HOME%\bin to the path as descripbed above. That way, you will be able to run any command line tools that come with Flex/AIR (such as the MXMLC-Compiler, which is used in the next chapter) directly without specifying the full path to the executable. However, this is optional, since we will be using Ant scripts rather than shell scripts.
Checking your Git client by cloning your repository
To check if your Git client is all set up, you should try and check out your project to some arbitrary folder to see if this works. If it doesn’t, it won’t work with Jenkins either! If it works, you can delete the newly created folder with the checked out code immediately afterwards, because the cloning/pulling will be part of the Jenkins job afterwards. You can’t continue unless your paths are correct, since Jenkins needs to find the executables for each tool and be able to check out your code!
Running your Jenkins job for the first time
To see if we are ready to continue with the actual tasks (i.e. the build script) just run the job by selecting it from the list on the home page and click “Build with parameters”. This will bring you to the mask where you can set the parameters as defined in the job configuration page previously. The first value is selected by default, so make sure the most recent Flex/AIR version is on top of your list in the job configuration page.
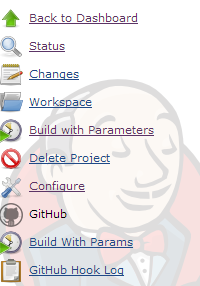
If everything works out as expected, you should get a green ball (or a blue one, if you haven’t installed the GreenBalls plugin) which means everything is ok. We haven’t done anything useful to the code yet, but that’s part of the next chapter.
What we have done so far
In this part of the tutorial, we have installed the tools required for building our app on a Windows server. We also have set up Jenkins as our CI server and created a parameterized job, whose main part consists of executing the build.xml build script which we created as a stub and which is on our GitHub repository.
If you’re all set, continue with Part 1: Compiling your code.