Installing a M.2 SSD in a T440s
- Step 1: Choosing the SSD
- Step 2: Opening the case
- Step 3: Removing the WWAN adapter and installing the disk
- Step 4: Formatting
- Step 5: Measuring performance
- Conclusion
- Sources
W hen I recently came to the point of upgrading the storage in my Lenovo T440s, I was looking for ways to do so. Luckliy, the T440s has an additional M.2 slot which allows for inserting various devices, including SSD hard drives. I followed the instructions from a LaptopMag blog post for a large part. Since in my case upgrading storage meant replacing the built-in WWAN adapter, I wrote this blog post as an addendum to the one from LaptopMag.
Step 1: Choosing the SSD
The first step – obviously – was buying an appropriate SSD. M.2 SSDs are pretty new to the game yet and therefore not as widely sold as their predecessors, the mSATA-SSDs. M.2-Disks come in various sizes and form factors, the T440s, however, only supports drives of 42mm width. Make sure you choose the right form factor, since 42mm-drives are the only ones supported by the T440s!
After reading various reviews though, it became clear, that MyDigitalSSD would be the disk manufacturer of my trust, not only in terms of reputation or disk speed, but also because the prices were really competitive. I eventually went for the MyDigitalSSD 256GB Super Boot Drive and ordered it on Amazon.
Unboxing
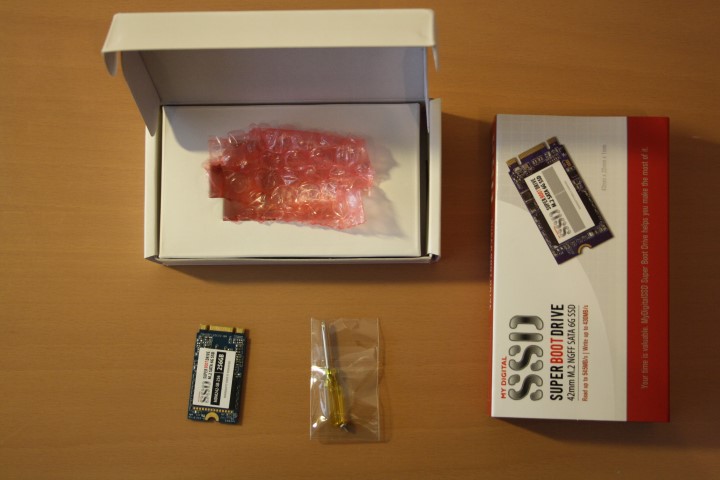
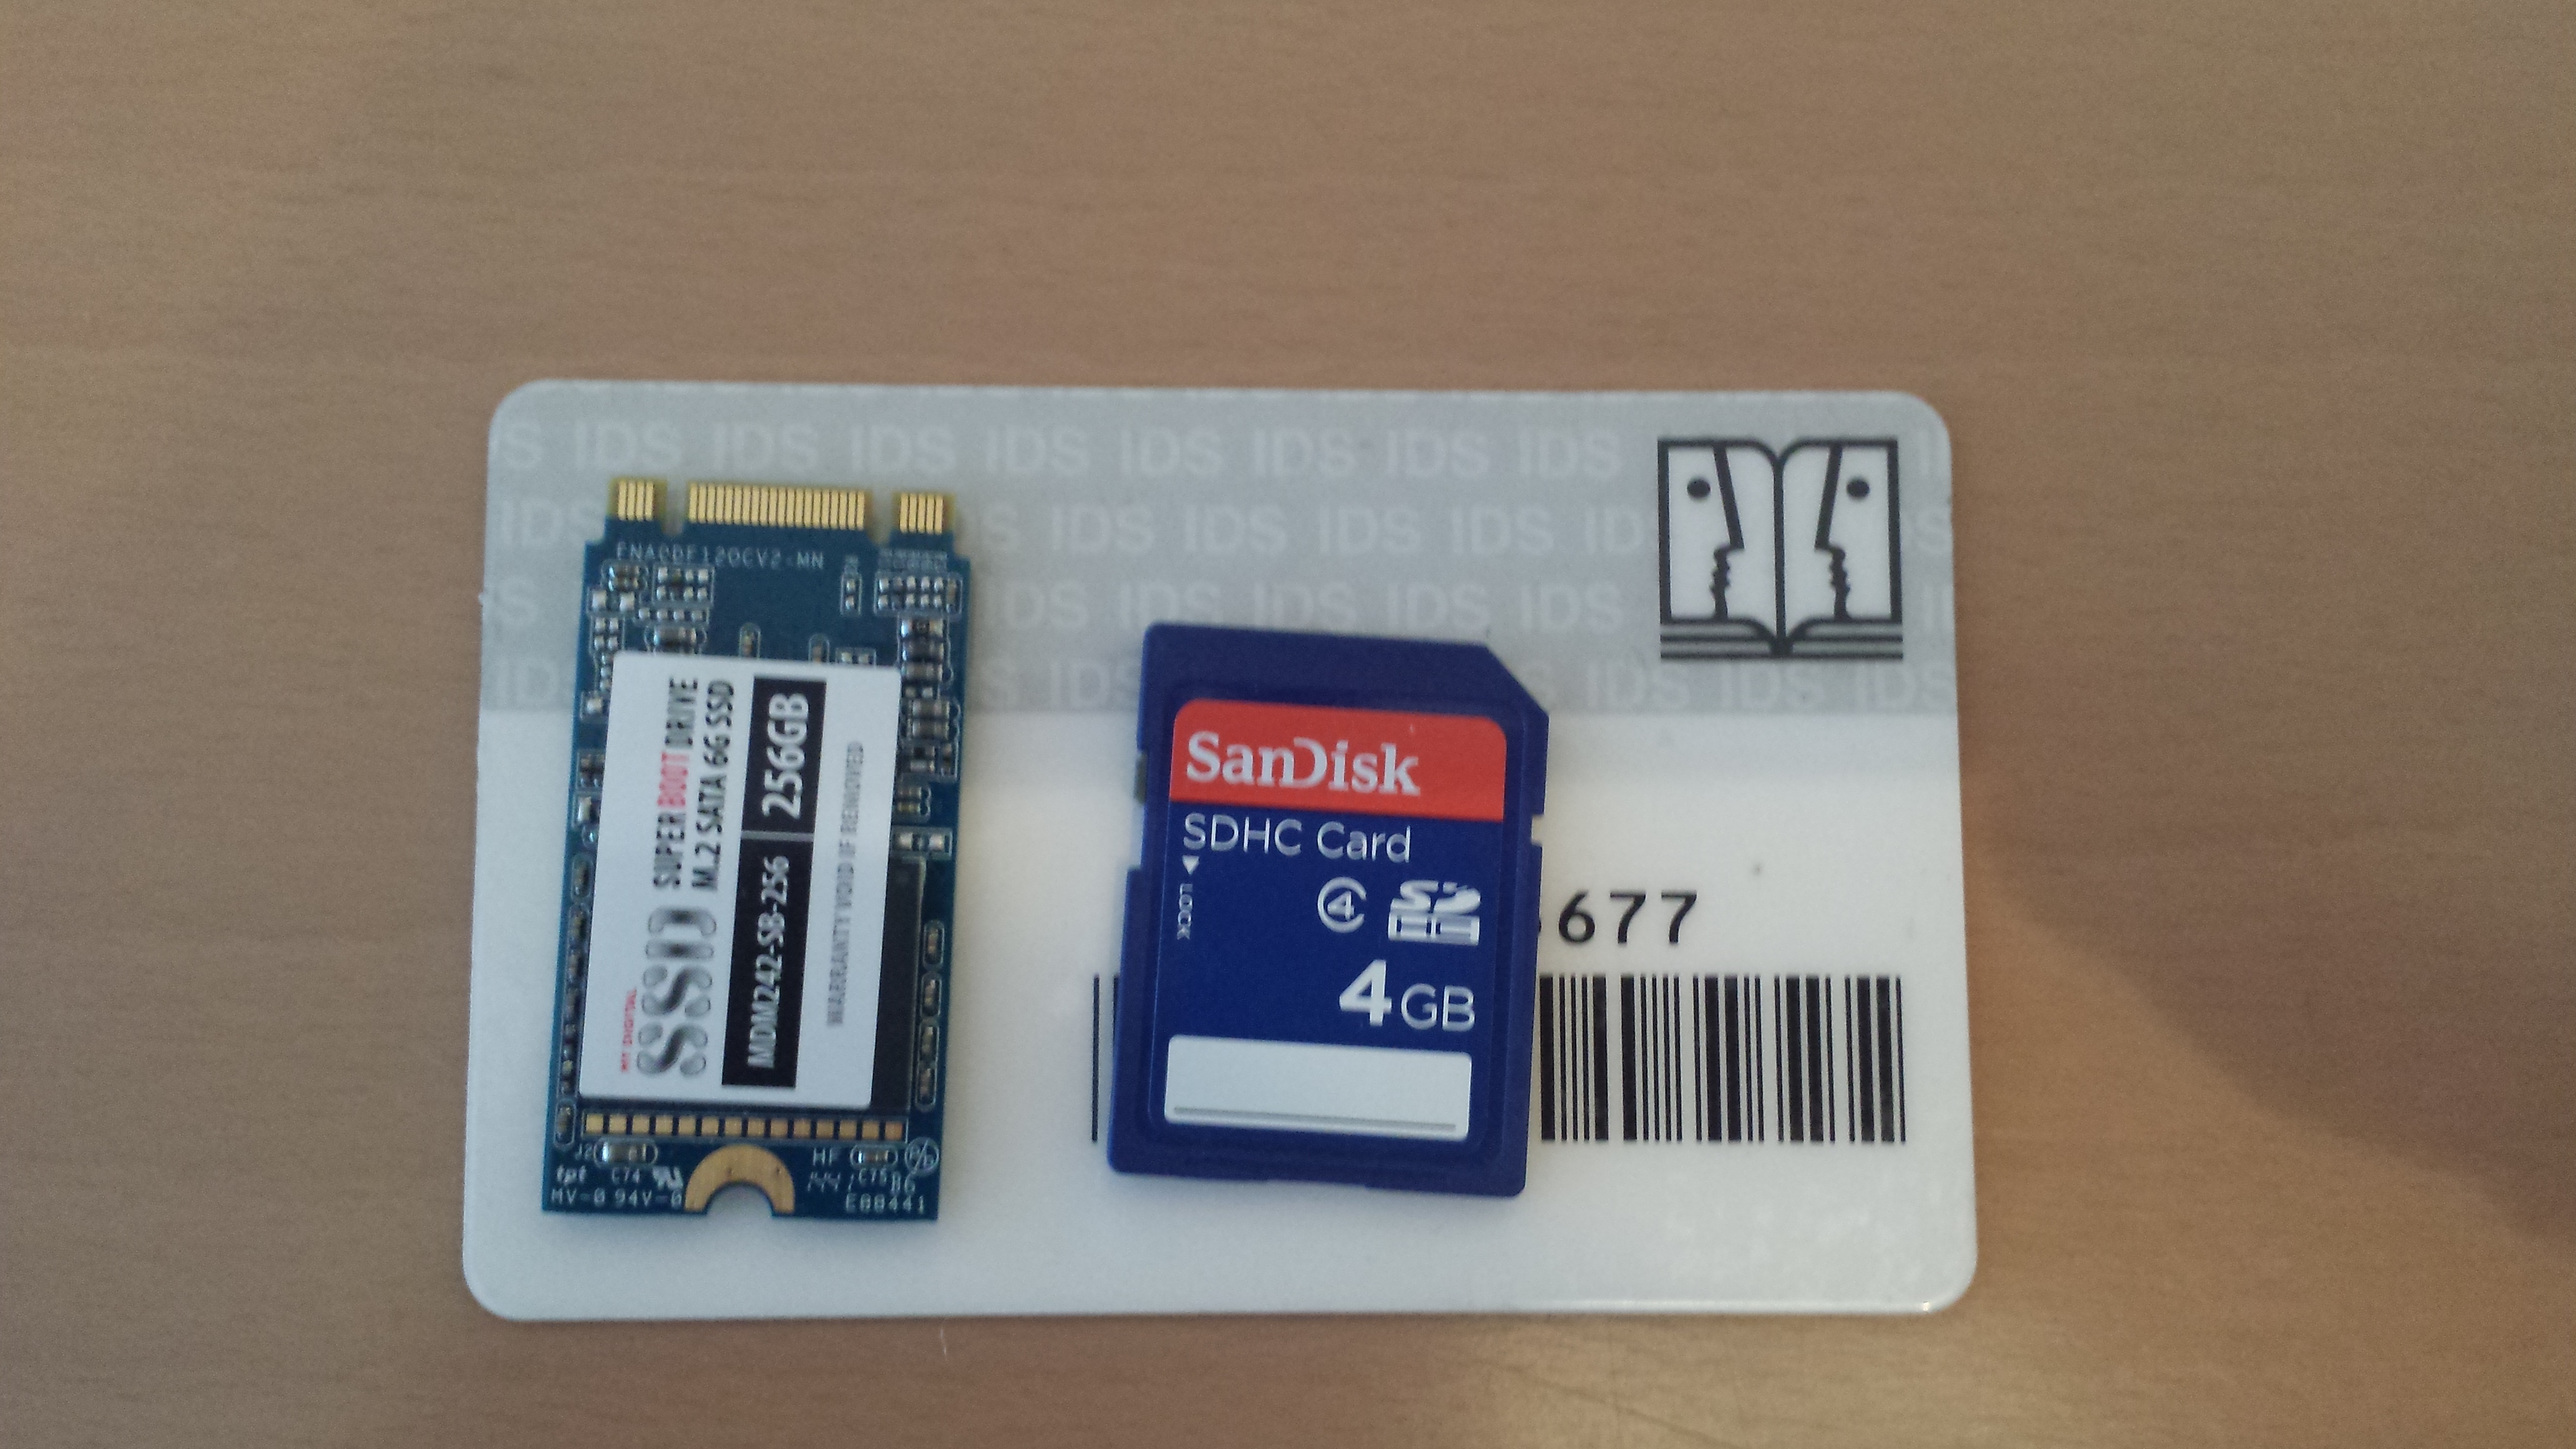
The drive came in a box containing the drive itself along with a tiny screwdriver and a screw (which I didn’t use since the T440s already has a screw inside holding the WWAN adapter). Thinking I’ve seen it all, I was still surprised how small and light the drive actually is. Only slightly larger than an ordinary SD card and weighing only a few grams, you will never notice the drive after updating – apart from the augmented disk space, of course ;-).
Below is a picture of the box the disk came in and a disk ontop of a credit card sized plastic. Unbeliavble how small these things have become…

Step 2: Opening the case
Before opening the case, make sure you have disabled the internal battery in the BIOS/UEFI and removed the external battery!
To open the case I had to loosen the six screws indicated in the LaptopMag post. Opening the case proved to be much harder than expected (“if you feel resistance, make sure all screws are completely loose”). What I didn’t know is that the screws had tiny nuts on the inside of the case. These are meant to prevent the screws from falling out of their holes and thus staying together with the bottom part of the case. This is actually a good thing meaning you can’t really lose the screws. However, should you (like me) still manage to entirely remove the screws, you can/should re-attach their bolts before continuing. After all, you don’t want to end up missing one of those tiny screws after upgrading your laptop.


Step 3: Removing the WWAN adapter and installing the disk
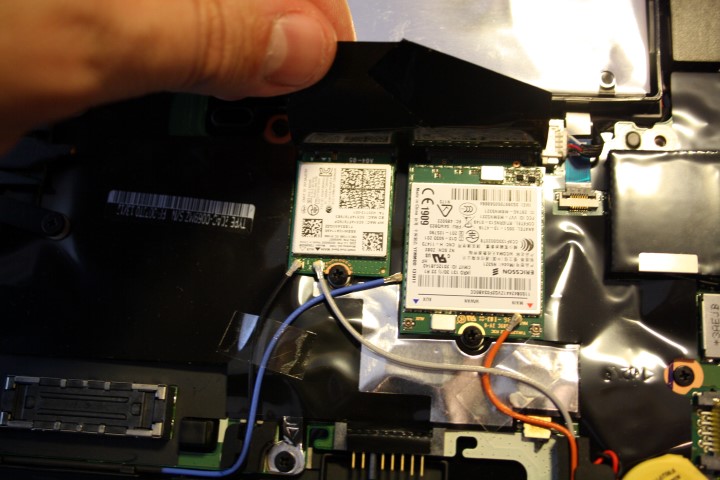
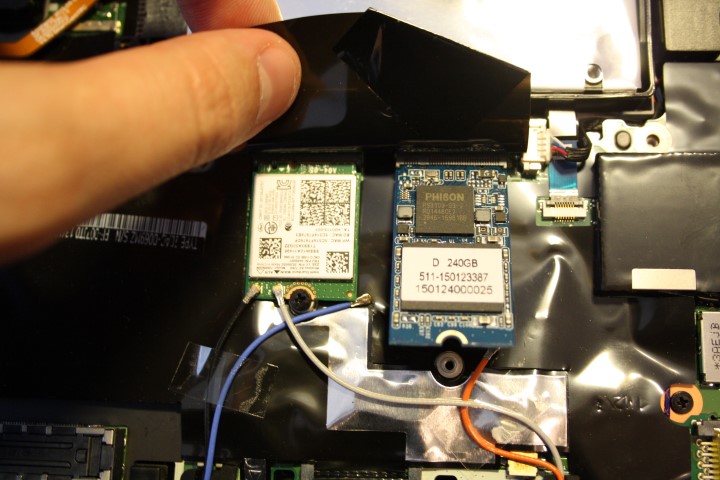
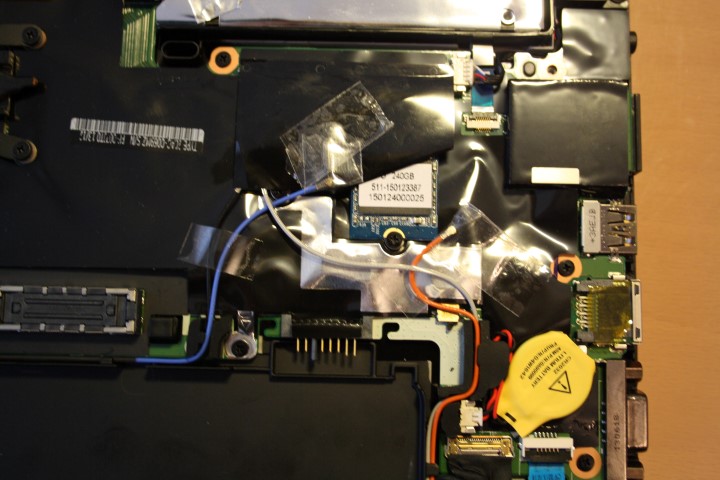
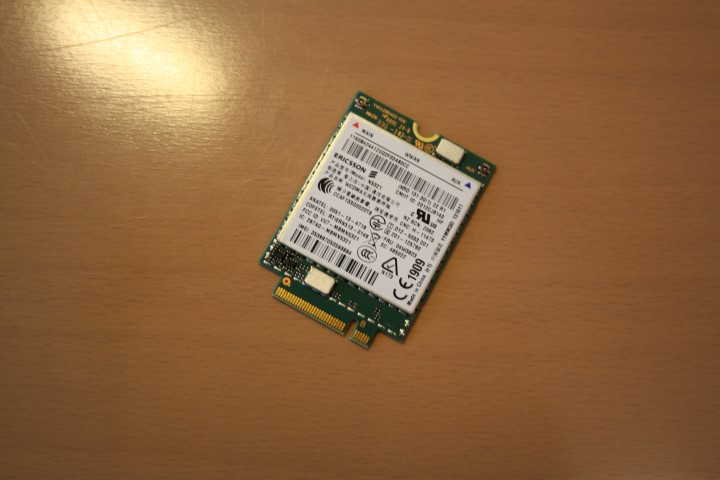
After prying open the case, I first had to remove two cables from the WWAN adapter. Luckily, those were not soldered to the device itself, so that I had no problem removing them using a pair of tweezers. I am not sure what the cables are for, but judging from their color (blue and red) I suspect for some sort of power source (or antenna?). So I covered the ends with duct tape for insulation, and stuck them to the black foil, since I didn’t want to have loose power chords dangling around on the inside of my beloved T440s. After loosening one final screw and pulling out the WWAN-adapter I had a free M.2 slot. Installing the SSD was a breeze after that, requiring only inserting the disk into the slot and tightening the screw (the SSD is powered by the M.2 slot). That kind of flexibility is one thing I particularily like about Lenovo T-series laptops.
Step 4: Formatting
After screwing the cover back to the laptop I came to restarting the computer and see if things worked as expected. I pushed the power button and… nothing happened. The screen stayed black and there was no sign of the computer booting up. I double checked the battery, which I had inserted after screwing everything together. After an initial panic attack (short circuit?) I decided to put the laptop back into the docking station and booting up from there. To my relief, that did the trick and Windows booted normally. After consulting the UEFI one last time, it became clear that the internal battery would be re-enabled automatically after connecting the charger to the laptop. Seems like the laptop can only boot with the internal battery enabled… Should your laptop remain dead after upgrading storage, plug in the power chord and try booting again by pressing the power button.
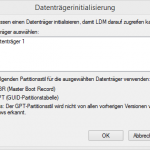
Because the disk is brand new and not formatted for a particular file system, I had to do this myself by opening disk management (see this page for instructions how to do so). There it way, the newly installed SSD. Before formatting I had to choose the partitioning style. I choose GPT and one click and two seconds later I was proud owner of a 512GB SSD T400s laptop. *GPT is MBR’s successor and has many advantages. You should choose GPT over MBR under any circumstances, unless you really know you still need MBR. See this post for a more detailed explanations.
Step 5: Measuring performance
The first thing you want to do after installing a super-fast SSD is of course measuring its real performance and comparing it the the specs printed onto the packaging. The disk showed up as a 223GB drive in windows, so it is 33GB smaller than advertised (in terms of usable disk space) and almost 15GB smaller than the built in SSD the T440s came with. Reviewing the photos for this post the reason became obvious immediately: They used a 240GB storage chip (as written on the sticker on the back), and not a 256GB one!
Before you start posting comments about the issue: I know that the 256GB on the package are based on measuring using the decimal system. The “real” usable disk space is usually measured in binary, meaning the 256 gigabytes (10-based) equal to approximately 238 gibibytes (2-based). I think manufacturers should really start using the binary system to indicate the disk space of their drives, since the discrepancy between the value on the package and the value shown by the operating system only leads to confusion of a lot of buyers.
I am a bit disappointed by the fact that the usable disk space is more than 6 percent smaller than indicated (and almost 13% smaller than printed on the package, taking that value for granted!).
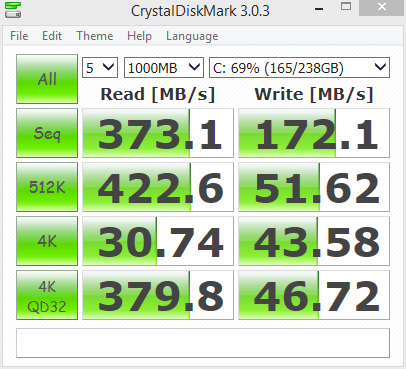
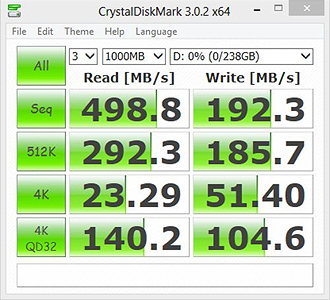
In terms of speed, however, the disk pretty much lived up to the official measurement values from the Homepage, performing sligthly better with bigger chunks and a bit slower on smaller chunks. Considering I had a few programs open while conducting the measurements, this drive should be blazing fast when reading and perform very well in most laptops. However, the writing speeds were somewhere around 190MB/s, never reaching the 430mB/s for any chunk size. This is also consistent with the official benchmark values from MyDigitalSSD.

Conclusion
The Super Boot Drive sure is blazing fast when reading and also quite fast when writing, but never even coming close to the advertised 430MB/s writing speed. I don’t know why MyDigitalSSD claim such high speeds when they can’t even prove them in their own benchmarks.
Update: I got a response from the manufacturer. The benchmark results are based on ATTO, not CrystalDiskMark. Considering the fact that the disk was even faster than advertised (see pictures above) using CrystalDiskMark as a benchmark tool, this disk performs as fast as promised.
On the other hand, the built-in Samsung drive that came with the T440s already seems to be reasonably fast, showing generally more balanced writing values over all chunk sizes than the MyDigitalSSD drive, sometimes even surpassing them. However, when writing small chunks the MyDigitalSSD outperforms the built-in drive.
What strikes me the most is the fact that MyDigitalSSD sell a drive as a 256GB when they evidentially attached a 240GB chip on it. Together with the falsy 10-based disk space (which manufacturers should do away with anyway) this leads to a significantly lower usable storage space than expected.
The decreased disk space is the result of a process called overprovisioning, which means a part of the disk is reserved to make up for broken storage cells. According to the manufacturer, this is common across all manufacturers nowadays. I’m still a bit disappointed thought, because I think when you buy a 256GB disk you should also get 256GB of usable disk space (as was the case with the built-in drive).
All in all, the Super Boot Drive is still an interesting option for people who want to upgrade their notebook storage without adding too much to the weight (and without their wallet losing too much weight ![]() ).
).