Mobile App Development with Xamarin and MvvmCross – Part 4: Android UI
- Android view layer
- Creating the Activity
- Navigating between views (activities)
- What we have done so far
I n this article we are going to create our first Android view. To do this, we will create an AXML file, which will hold the layout of the individual UI components. This AXML file will also create bindings to the ViewModel, so that the view is automatically updated when the data in the ViewModel changes. Additionally, we will create a backing C#-class, which will hold the view logic for our layout.
Android view layer
Android separates its view layer into two types of assets:
- AXML-Files, which will define the layout, size and constraints of the individual UI components with an XML-based syntax
- Activities, which load AXML-defined layouts, access the contained UI elements and connect them with the application code
AXML files
AXML is an XML dialect for files to define both whole views as well as individual, reusable UI components. Android comes with a set of ready-made standard components, which can be extended and combined in order to create new components. Traditionally, AXML files are of static nature, but the contained components can be programmatically changed at runtime e.g. by changing their size, adding or removing components or registering event listeners.
MvX introduces its own tags to include framework functionality such as two-way data binding already in the AXML-layout. However, currently VisualStudio does not support content assist for these tags. To use the tags, their namespace must be imported with an arbitrary name. The following example illustrates using the MvxItemTemplate-Tag by including the MvX-namespace under the local prefix.
<?xml version="1.0" encoding="utf-8"?>
<LinearLayout xmlns:android="http://schemas.android.com/apk/res/android"
              xmlns:local="http://schemas.android.com/apk/res-auto"
              android:orientation="vertical"
              android:layout_width="match_parent"
              android:layout_height="match_parent"
              android:minWidth="25px"
              android:minHeight="25px"
              android:id="@+id/myViewController">
  <MyListView
      android:id="@+id/agendaItemList"
      android:layout_width="match_parent"
      android:layout_height="match_parent"
      android:fastScrollEnabled="true"
      android:scrollbarSize="80dp"
      local:MvxItemTemplate="@layout/my_item"
      />
</LinearLayout>
The following table shows a selection of commonly used MvX-tags in AXML along with a usage example:
| TAG | USAGE | CODE EXAMPLE |
|---|---|---|
local:MvxItemTemplate |
Within a list this tag can be used to load the referenced AXML file to render a single list element. | Will load Resource/layout/my_item.axml to render a list element: local:MvxItemTemplate="@layout/my_item" |
local:MvxBind |
Within some UI components this tag can be used to create an automated data binding between the ViewModel and the UI component. The UI component will be refreshed when the data in the ViewModel changes and changes in the UI component (e.g. a TextInput element) will be reflected in the ViewModel data. | Will use the Items-property on the ViewModel as data source for list elements in a List defined in AXML:local:MvxBind="ItemsSource Items"Will connect a click on a UI element with the ShowDetail-Property (must be of type System.Windows.Input.ICommand) on the ViewModel: local:MvxBind="ItemsClick ShowDetail"Will bind the Text-property on a label with the Title-Property of the underlying element in a list item: local:MvxBind="Text Title" |
Creating the Activity
In order to use the newly defined AXML-layout we need to create an Activity, which is any class that extends Android.App.Activity. The Activity represents the UI logic of the layout and can be used for example to register event handlers. When using MvX, every Activity must be extended from Cirrious.MvvmCross.Droid.Views.MvxActivity (_which extends _Android.App.Activity) and follow a strict naming convention to be loaded by MvX when navigating to a ViewModel. MvX will load the Android activity based on its class name. That’s why a class must be named like the corresponding ViewModel, without the …Model-suffix (e.g. for MyViewModel.cs the corresponding Android activity must be named MyView.cs).
In Xamarin/MvX, every displayed view in Android can be created by following three simple steps:
- Define the view’s layout by creating an AXML file. The AXML file syntax is identical with the one of a standard Android application written in Java with the exception of the special MvX tags.
- Create an Activity class extending MvxActivity which is annotated with [Activity]. If the view serves as entry point when the app starts, the MainLauncher-attribute must be set to true. This is the case if the view belongs to the ViewModel that was registered with the AppStart (see previous article).
- Override the onCreate() function to load the layout when the activity is created.
The following code snipped shows a very basic implementation of MyView.cs, which can be used as view in the Android UI project for the MyViewModel-ViewModel.
[Activity(Label = "View for MyViewModel", MainLauncher = true, Icon = "@drawable/icon")]
 public class MyView : MvxActivity<MyViewModel>
 {
     protected override void OnCreate(Bundle bundle)
     {
         base.OnCreate(bundle);
         SetContentView(Resource.Layout.MyViewLayout);
     }
 }


Additional Views
Any other Android view can be created just the way it was described above. Any activity can have the MainLauncher attribute set to true, whether its ViewModel is registered as main ViewModel upon app start or not. The MainLauncher attribute simply defines that the activity can serve as an entry point (for example when launching from another app via Intent).
Navigating between views (activities)
As stated before, navigation in MvX happens over ViewModels, not views. This is to ensure the navigation logic has to be implemented only once and is consistent across platforms. A view can be changed by calling _ShowView
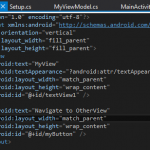
MvX uses reflection also for command binding. The ICommand property name must end in …Command and the bound property in the AXML file must match the name exactly (without the Command-suffix). The following example illustrates binding a navigation from MyViewModel.cs to OtherViewModel.cs upon click on a button in MyViewLayout.axml.
<?xml version="1.0" encoding="utf-8"?>
<LinearLayout xmlns:android="http://schemas.android.com/apk/res/android"
              xmlns:local="http://schemas.android.com/apk/res-auto"
    android:orientation="vertical"
    android:layout_width="fill_parent"
    android:layout_height="fill_parent">
    <TextView
        android:text="MyView"
        android:textAppearance="?android:attr/textAppearanceLarge"
        android:layout_width="match_parent"
        android:layout_height="wrap_content"
        android:id="@+id/textView1" />
    <Button
        android:text="Navigate to OtherView"
        local:MvxBind="Click ShowOtherView"
        android:layout_width="match_parent"
        android:layout_height="wrap_content"
        android:id="@+id/myButton" />
</LinearLayout>
public class MyViewModel : MvxViewModel
{
    (...)

    private ICommand _showOtherViewCommand;
    public ICommand ShowOtherView
    {
        get
        {
            _showOtherViewCommand = _showOtherViewCommand ?? new MvxCommand(() => ShowViewModel<OtherViewModel>());
            return _showOtherViewCommand;
        }
    }

}
What we have done so far
In this chapter we have defined an Android view by defining its layout in AXML and creating the corresponding Activity as a C# class. We have connected some of the displayed data with the data in the ViewModel by using MvX-tags in the layout.