Mobile App Development with Xamarin and MvvmCross – Part 5: iOS UI with Storyboard
- Behind the scenes
- Getting started with storyboardy
- Navigation
- Troubleshooting
- What we have done so far
< img src="/assets/img/wp-content/uploads/2015/10/example_storyboard-224x300.png" alt="" />
In the last article, we saw how to programatically create iOS-Views using nothing but C#-code. However, this way of creating user interfaces is often quite cumbersome and prone to errors. An alternative and much more intuitive approach to design user interfaces for iOS (which is also advertised by Apple as the standard way) is the usage of so-called Storyboards. Storyboards provide a set of UI-Views, which can be populated with other UI elements like buttons, labels, lists and so on by drag’n’dropping them using a visual editor. Transitions between views can be modelled by using Segues. Luckily, Xamarin comes with its own UI designer for iOS in the form of a Visual Studio plugin. This means you can create your native iOS-UI directly on your Windows machine like in the screenshot above.
In this article we are going to explore various ways of creating beautiful UI views using storyboards while using MvvmCross as the underlying framework at the same time.
However, there’s (as always) a catch in using storyboards: Navigating with segues (the previewed way of navigating between views when working with storyboards) means navigation is being done in the view layer (i.e. the iOS UI-Project when using Xamarin). This differs fundamentally from the navigation concept of MvvmCross, where navigation is done in the ViewModel layer (i.e. the core project when using Xamarin). Luckily, there are ways to use storyboards and MvvmCross side by side without sacrificing any of the advantages of either.
Behind the scenes
We will see what steps are needed to use storyboards in Xamarin below. However, it may be helpful to gain a certain insight in what’s being done in the background instead of strictly following guides without really knowing what you’re doing or why. This section should provide you with the most important conceptual information.
The iOS designer shipped with Xamarin is basically an extension for VisualStudio that imitates the Interface Builder that comes with Xcode. When using storyboards, the views are designed with this iOS designer ins VisualStudio and are then sent to the iOS build host. This will result in an XML-based .storyboard-file, whose contents should normally never be touched by hand. UI elements that you want to access from your custom can also be defined resulting in so-called outlets. Views defined in a storyboard result in an equivalent C# class where the outlets can be accessed as properties.
As said, Xamarin will automatically create a class for each view defined in the storyboard, as soon as you set the class identifier for the view (you will see later how this is done). This class will inherit from one of the ones included in the Xamarin-SDK, e.g. UIViewController, UITableViewController and so on. Like in Android, there is a C#-equivalent for every view type and UI element trying to mimick what’s being done in the corresponding Objective-C class from the native SDK.
However, MvvmCross comes with its own set of base classes classes for the most important iOS view types (not for every single UI element). The MvX-view classes inherit indirectly from one of the standard Xamarin.iOS-classes, adding framework functionality to it. If you’re using MvX as the framework of your choice, you must use the MvX view classes as base class, not the Xamarin.iOS class if you want to make use of advanced framework features such as data binding between View and ViewModel. This means you will have to change the generated class to inherit from the MvX-class to take advantage of framework functionalities like two-way data binding and ViewModel-navigation. You will see see the details on how to do so below in the next section.
When navigating Views are loaded by MvX using a container, which is responsible for looking up the correct view class by its name, creating (i.e. instantiating or recycling) it and connecting it to its ViewModel. This match between View and ViewModel is normally done automagically in the background by the framework using reflection. However, if the navigation between is not done in the ViewModel layer (i.e. by the framework), MvX is not informed about view changes and can therefore not match the View to its ViewModel. That’s why every MvX-View has a Request-property which can be overridden to tell the framework what ViewModel it wants to be connected to. We will see one case where this must be done in the last section.
Getting started with storyboardy
A storyboard is normally included in every iOS mobile project when starting out with Xamarin and VisualStudio. The following descriptions describe the steps to setup a Xamarin solution from scratch which uses MvvmCross as the framework and storyboards as means of creating the user interface. The individual steps are illustrated with corresponding pictures below.
- Create a new project in VisualStudio (e.g. “Blank App Portable”) by choosing
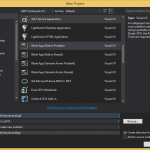
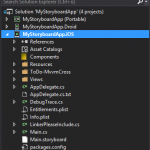
File > new > Projector pressing CTRL-Shift-N (picture 1). This will result in a project structure similar to the one in picture 2. - Set the iOS project as startup project by right-clicking on the iOS-Project and choosing Set as startup project.
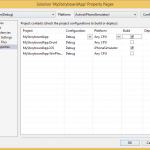
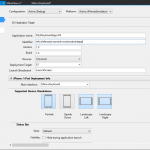
- Configure the core project to be built together with the iOS project in each desired launch configuration like iPhone, iPhone Simulator, etc. by right-clicking on the solution and choosing Properties (picture 3). If you don’t do this, you will not be able to start your project because the DLL from the core project is missing. This is a bug in VisualStudio which hopefully will be corrected in the near future.
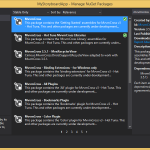
- Add MvvmCross NuGet-package to both the core project and your iOS project (picture 4). This will result in a bunch of assemblies added as a reference to your projects as well as a number of files automatically generated to illustrate the usage of ViewModels and Views in MvX.
Delete the following files in each project</p>
- Core project: ViewModel-Folder, ToDo-MvvmCross-Folder, MyClass.cs
- iOS UI project: Views-Folder, ToDo-MvvmCross-Folder, ViewController.cs
- Create a new class (e.g. named
StoryboardContainer) which inherits from MvxTouchViewsContainer. Override the CreateViewOfType function as follows:
protected override IMvxTouchView CreateViewOfType(Type viewType, MvxViewModelRequest request)
{
	return (IMvxTouchView)UIStoryboard.FromName("Main", null)
		.InstantiateViewController(viewType.Name);
}
This will result in a new view container loading the views directly from the storyboard. The name of the storyboard is hardcoded here (“Main” for Main.storyboard), so make sure you update this string if you rename your storyboard file.
- Open the
Setup.csclass in the iOS project and replace the generated constructor with this one:
public Setup(MvxApplicationDelegate appDelegate, IMvxTouchViewPresenter presenter)
    : base(appDelegate, presenter)
{
}
Also, override the following method to return the new views container created in the previous step.
protected override IMvxTouchViewsContainer CreateTouchViewsContainer()
{
    return new StoryboardContainer();
}
This will result in the newly created views container being constructed and used by the framework during the bootstrapping phase.
- Open
AppDelegate.csin the iOS project and change it so that it inherits from MvxApplicationDelegate:
[Register ("AppDelegate")]
public class AppDelegate : MvxApplicationDelegate
{
  // generated code here...
}
Also override the FinishedLaunching function as follows (the other, overloaded FinishedLaunching-function can be deleted):
public override void FinishedLaunching(UIApplication application)
{

    var presenter = new MvxTouchViewPresenter(this, Window);

    var setup = new Setup(this, presenter);
    setup.Initialize();

    var startup = Mvx.Resolve<IMvxAppStart>();
    startup.Start();
}
This will result in the bootstrapping being executed in the correct order.
- Add/create your storyboard file in the iOS project (if it doesn’t exist yet). Make sure the file name corresponds to the string hardcoded in step 5. Open this storyboard file with the iOS designer in VisualStudio and layout your views. Don’t define any view transitions (i.e. Segues) yet. Just make sure the the root ViewController is set.
- For each view that you want to be managed by MvX (which should be all in most cases) set the
Classproperty using VisualStudio’s property inspector (picture 6). This will result in a generated class with exactly the same name. Also set the Storyboard ID to the same value like theClassproperty. The match of Storyboard ID and the class name is crucial or MvX will not be able to load the layout for a view from the storyboard when navigating!If you have UI elements that you want to reference in your C# code (like for example a button that you want to attach a click listener to) you can select the element and set itsName-property to an value (picture 7). The value can be an arbitrary string, however I suggest you use a suffix that indicates the type of the element you’re referencing (i.e. “…Button” for UIButtons). The generated class is partial and consists of two generated files (suppose we created a view called MyView) which will be combined to form the actual class:</p>MyView.cs: This file contains the user defined portion of the view class. Changes to the view like attaching listeners, updating UI elements and so on must be done in this class.MyView.designer.cs: This file contains the generated portion of the view class. Any changes made in this class will be overwritten when the storyboard is updated, so don’t touch this file.
- Create a ViewModel by making a class
MyViewModel.csin the core project. Make sure the class name matches the view it will be backing (plus theModel-Suffix) and that it extendsMvxViewModel. - Change the newly created view class (in the above example:
MyView.cs) so that the view inherits fromMvx...ViewControllerinstead ofUI...ViewController. There is a corresponding view class in MvX for each Xamarin SDK class, so replace the dots with the corresponding view types. For example: UIViewControllerbecomesMvxViewControllerUI<strong>Table</strong>ViewControllerbecomesMvx<strong>Table</strong>viewControllerUI<strong>TabBar</strong>ViewControllerbecomesMvx<strong>TabBar</strong>ViewController- … and so on…
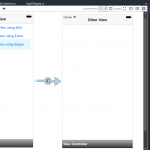
- Add additional views and (optionally) segues between views by dragging the ViewControllers from the VisualStudio Toolbox onto the storyboard (picture 8) and repeating the steps above (setting
Classproperty, Storyboard-ID, creating ViewModel, defining outlets, …). - Set the storyboard file as the main interface under project properties.
Navigation
With storyboards and MvX combined there are usually three slightly different variants of how navigation can be done between views, which will be described separately in individual sub-sections below:
- ViewModel-Properties of type
ICommandin the core project can be bound to UI elements in the view project - Listeners can be attached to events of UI elements in the view project, which then trigger some action (like navigating between views) on the ViewModel in the core project.
- Navigation can be done by using segues, skipping the ViewModel-to-ViewModel approach of MvX altogether. MvX must then be informed manually of view changes in the UI.
Variant 1: Binding to ViewModel properties
This is the variant that follows the navigation paradigm of MvX the closest. Immediately after loading the view the binding can be made by calling the CreateBinding-method of the MvX base class of the view to bind the default event of an UI element (e.g. a click on a button) to a command property on the ViewModel. This can be done as follows by overriding the ViewDidLoad-method.
public override void ViewDidLoad()
{
  base.ViewDidLoad();
  this.CreateBinding(NavigationMvXButton).To<MainViewModel>(vm => vm.ShowOtherView);
}
``

The command property on the ViewModel could be defined as follows:

```csharp
private ICommand _showOtherView;

public ICommand ShowOtherView
{
    get
    {
        if(_showOtherView == null)
            _showOtherView = new MvxCommand(() => ShowViewModel<OtherViewModel>()).Apply();
        return _showOtherView;
    }
}
Following this variant will allow for binding the default event assumed by MvX to a specific command in the ViewModel. If you want to trigger navigation on a different event type, let’s say’ when double-tapping the button, you will need the next variant.
Variant 2: Attaching listeners
This is actually a sub-variant of the above variant. Navigation is also done in the ViewModel, but instead of directly binding to a property on the ViewModel, an event listener is registered on the UI element which will trigger the corresponding command on the ViewModel programmatically.
partial void NavigateMvXDesignerButton_TouchUpInside(UIButton sender)
{
    ViewModel.ShowOtherView.Execute(sender);
}
This variant allows to add some logic between user interaction and view navigation. Event listener can also be defined very easily by double-clicking an UI element of the storyboard in the iOS designer, but the result will also be more verbose because execution of the command must be triggered programmatically and is not done automatically by the framework.
Variant 3: Using segues
This variant follows Apple’s recommendations and makes use of the full potential of storyboards, because not only the views can be visually represented in the storyboard, but also the navigation between them. It is Apple’s recommended way of designing user interfaces and represents a 1:1 match to how UIs are designed in Xcode. On the other hand, it results also in a fundamentally different navigation concept because navigation is done entirely in the view, skipping MvX’ ViewModel layer entirely. Because of this, MvX must be informed of the view change and the corresponding ViewModel of the destination view must be set manually before making the transition. This is done indirectly by setting the Request-Attribute on the destination view as follows:
public override void PrepareForSegue(UIStoryboardSegue segue, NSObject sender)
{
    if (segue.Identifier == "showOtherView")
    {
        var otherView = segue.DestinationViewController as OtherView;
        if (otherView != null)
        {
            otherView.Request = new MvxViewModelRequest<OtherViewModel>(null, null, new MvxRequestedBy());
        }
    }
}
This also requires defining a segue between the views by holding CTRL and clicking a UI element on the first view (e.g. a button) and then dragging the segue to the second view. The segue must also be named by setting its Identifier-property to an arbitrary value using VisualStudio’s Property inspector, whereas it is (again) crucial that the name matches the one defined in code (in the above example showOtherView).
Comparison
The following table shows advantages and disadvantages of for variant of navigating between views:
| Pro | Contra | |
| Variant 1 |
|
|
| Variant 2 |
|
|
| Variant 3 |
|
|
Troubleshooting
Xamarin’s iOS designer provides a helpful and much more intuitive way for creating iOS interfaces or transitions in a single file. Having said that, unfortunately the iOS designer is far from being bug-free and can be quite a PITA at times. For example exat positioning of UI elements can become damn near impossible depending on the zoom level selected. Further, changes in the Storyboard do not always reflect in the app immediately.
Sources for failures are – as always with Xamarin – manifold and often the time needed to track down a certain error is not worth the effort. Often, it is enough to clean/rebuild the project or the whole solution. Sometimes it is even necessary to restart VisualStudio.
Sample code
If all else fails, you can find the code for a (very basic) sample application in my GitHub-Repository.
What we have done so far
In this chapter we haved learned how to use Storyboards in Xamarin/VisualStudio together with the MvX-Framework. We have also reviewed the differences between a Segue-based navigation in Storyboards and the navigation concept in MvX.